


Follow along with this guide as we switch adapt a Clubhouse Fun Minnie to work with standard 3.5mm AT Switches.

Required Items:
3.5mm (1/8) “Free Hanging” Stereo Jack


- Single core coated wire (braided will work but is harder)
- Shrink wrap tubing
- Lighter
- Soldering Iron
- Helping hands (optional but recommended)
Steps: Unpackaging (Important if adapting to give as a present).
- Cut the tape at the front of her box on both sides.
- Pull down the front flap and cut Minnie free at both of the tiny plastic ties and the big zip tie.

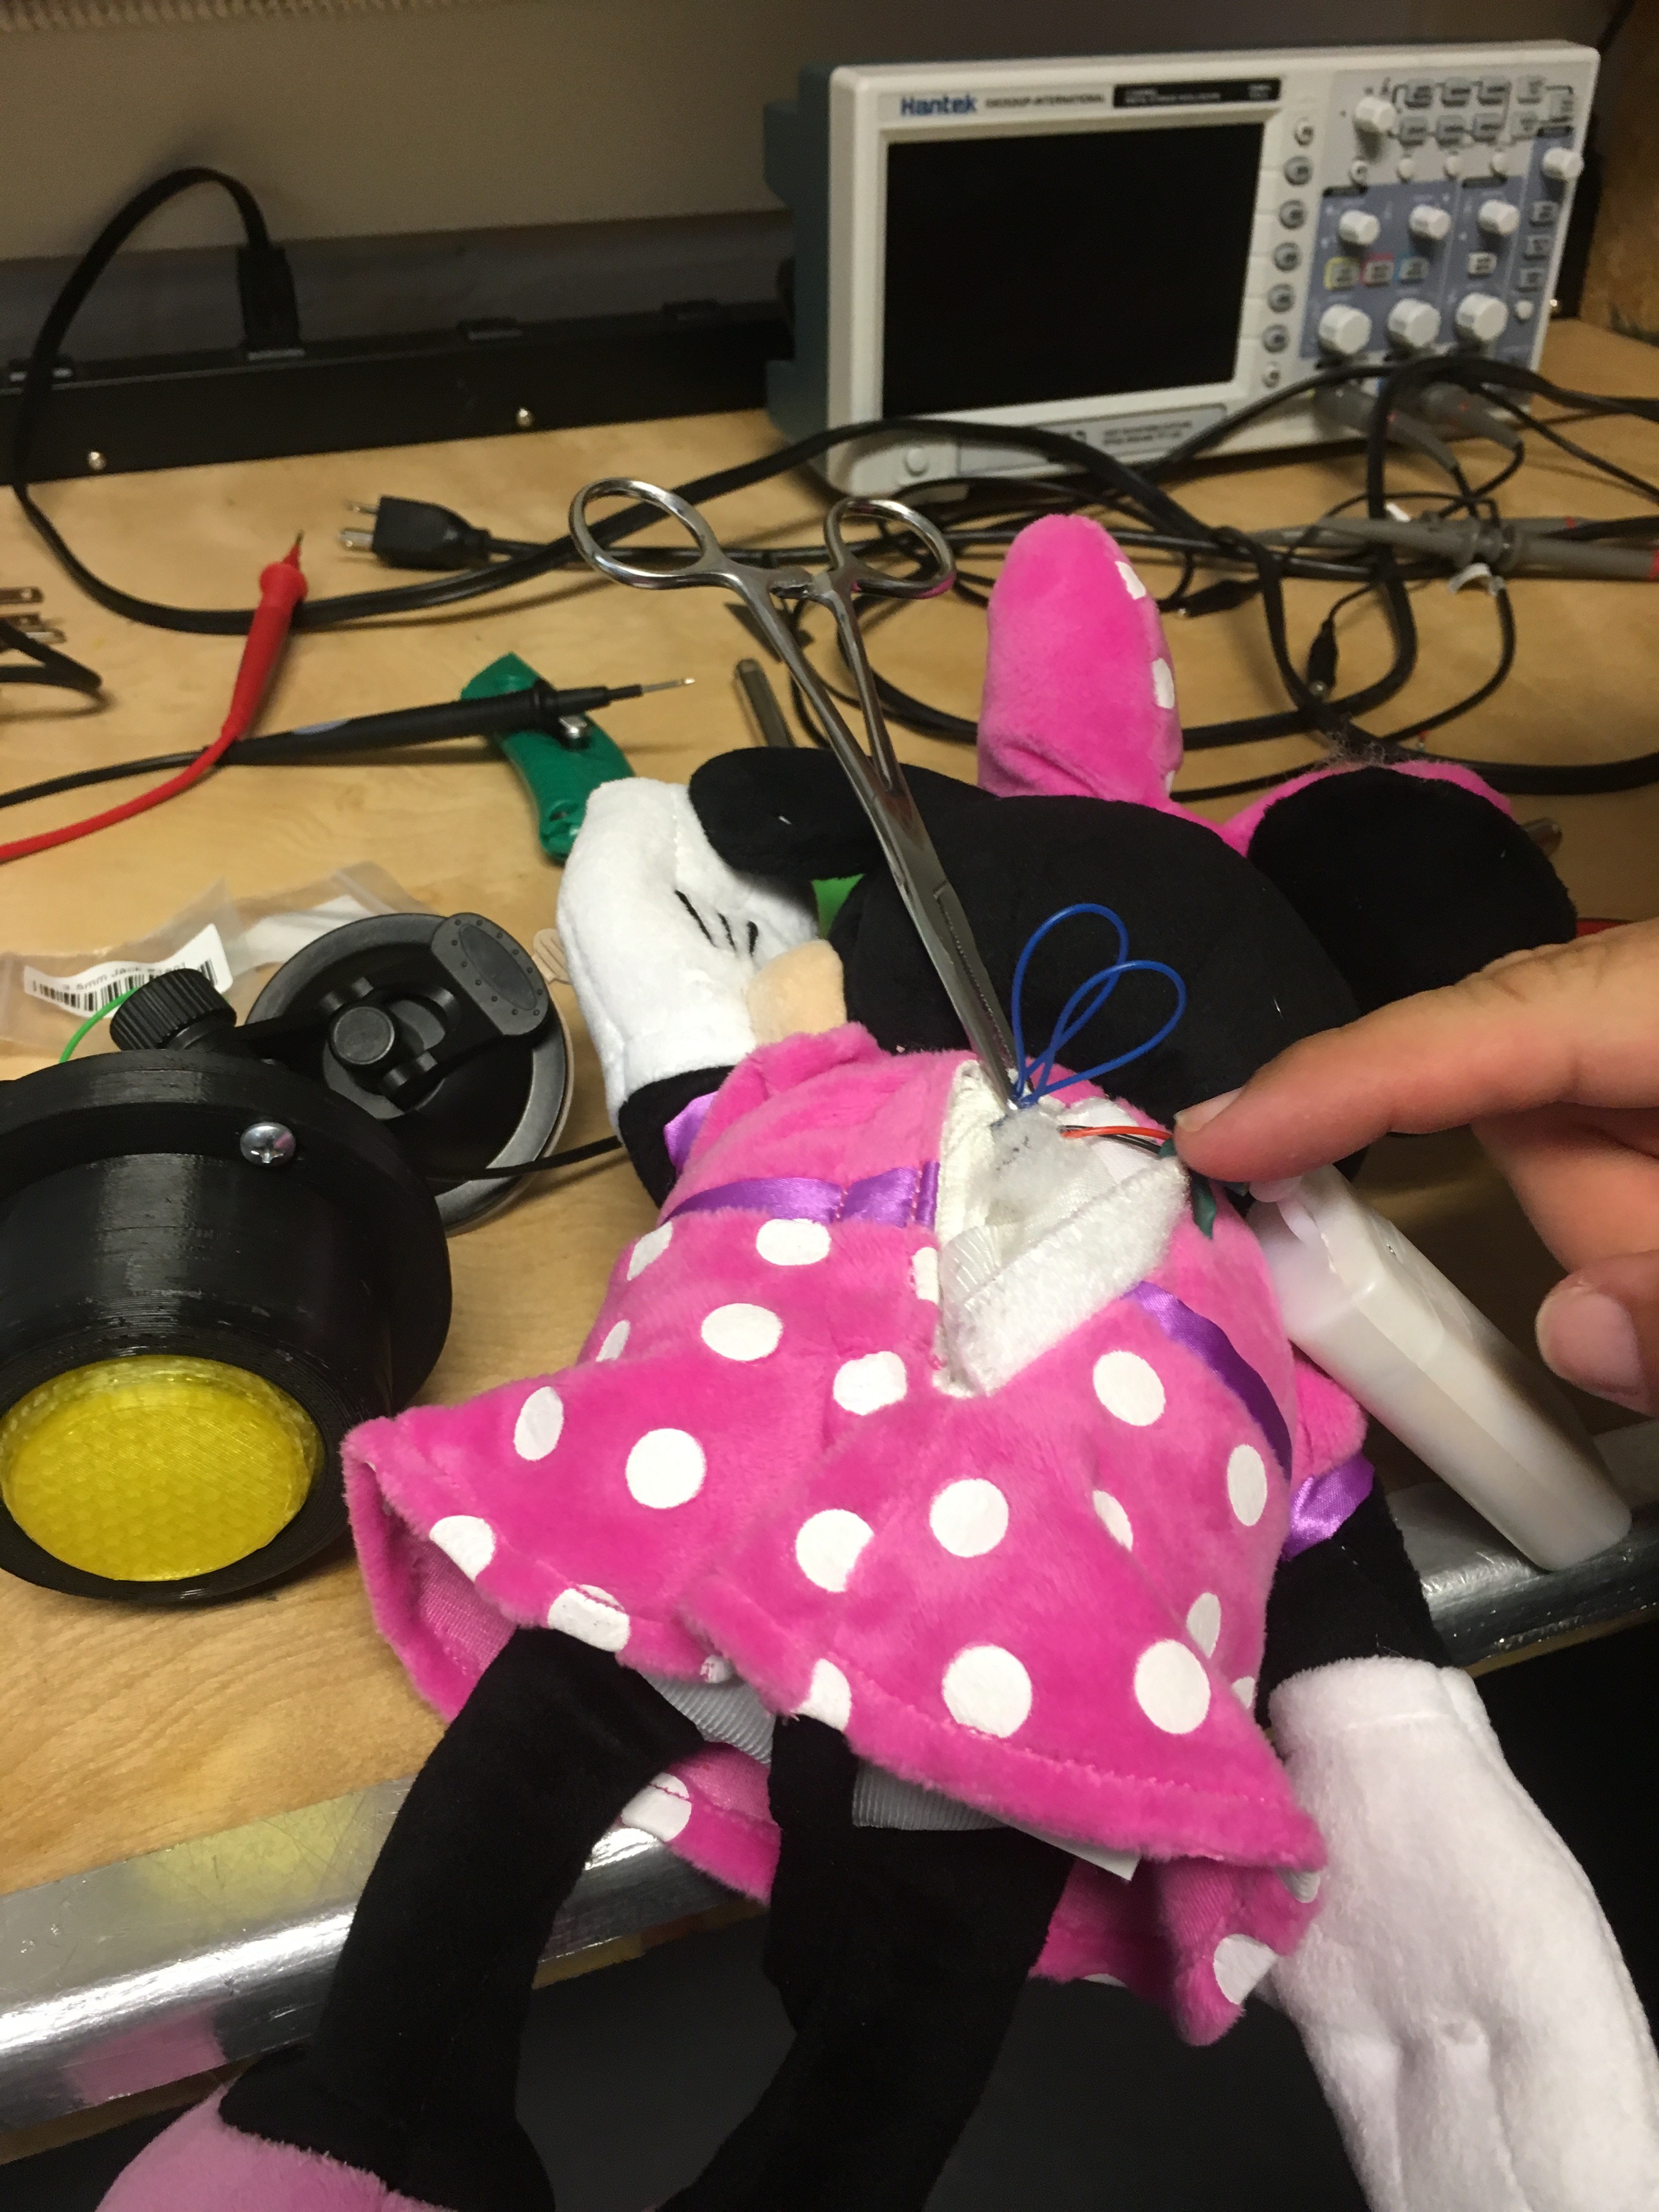
- There is a sleeve that the battery pack sits in on Minnie’s back. You will need to cut through that sleeve to get to the wires you need which are the two that run to her hand. You will first see two wires coming from the battery pack but those are NOT your wires.


- So you do need to cut through the battery sock to gain access to the stuffing (try to be as minimally invasive as possible). The wires you want are the wires running into her hand. So dig into the stuffing and up her arm pit to find those! (don’t worry, she’s not ticklish).

- Splice into the wires running to her hand by pulling the wires out far enough to cut them and then connecting a 3.5mm (1/8) “Free Hanging” Stereo Jack (adapted to mono-configuration). To do this simply splice both ends of the cut wire and one of the jack ends together (REMEMBER to add the shrink wrap before soldering).
- Test
- Standard Method – squeeze her hand
- Switch Method
- Repackage Mini by simply reassemble the box and put a zip tie through her bow to hold her in place to the back of the box.


You must be logged in to post a comment.